
It is believed that the origin of still life photography is entrenched within the romanticism of conventional mode of painting. If we shed light over the inherent meaning of still life, we can perceive it as a fundamental illustration of natural world in relation to a higher degree of scenic experience. While working with a canvas, a painter presents his dilemma, frustration, depression, enjoyment, aesthetic sense with the help of the brush and color. The same thing is true for a photographer, who uses his still life photography technique to express the inner feelings in order to make each and every photograph unique.
The Blend
In 17th century, still life painting raised to the level of fine art. These paintings were largely rich in their unique application of texture and vibrant colors along with radiant emphasis over multitude of shadowing. The scenes of the painting primarily focused on rich heritage of that time, illustrating the layers of food served on the table, packed with the costly wine, fine clothes, etc. The subjects of still life photography by that time were not abstract or complicated. The unique essence was derived by the special rendering and treatments given by the photographers. While Salvador Dali and Cezanne did much experimentation beyond the traditional limitation of painting, the periphery of still life photography was developed to a greater extent by Andre Kertesz and Man Ray.
A ’Blank’ Canvas
Similar to the painting, when a photographer starts his still life photography, he actually initiates the process from a ’blank’ canvas. There is no single scratch on it. Typically the still life photography is developed through the process of illustrating the scene in an empty space, where textures, shapes, colors, and tones are applied to give the photography a desired character. In addition, photographers exploit the lighting arrangement to give the photography a higher dimension. The last but not the least, darkroom skills are essential to make the picture seeable to the spectators.
The Application
Quite prevalently, the elements used in still life photography are not dynamic in nature. While learning the technique of still life photography, the learner knows about the in-depth aspect of camera view and camera perspective in addition to the lessons incorporating the segments like composition, use of light, color balance, contrast and concord of all ingredients. In other words, still life photography is an autonomous expression in which all of the ingredients combine to provide a unique contribution to the overall outcome. The application of still life photography is wide and varied including advertising, book covers, catalogue painting, brochure designing and many others. In fact, anything and every thing can be the subject of still life photography.
Whether you are a brand new photographer, an old hand looking to switch to digital photography, or just need to brush up on some photography techniques, online photography courses are extremely helpful.
Online photography courses come in a variety of formats and subjects. There are beginning courses for people who have never so much as held a camera before. These courses are great for teaching you the basics of how a camera works, how to frame a shot, and how to get what you want out of a photograph.
Other online photography courses assume that you already have some knowledge of photography and teach a specific skill. These skills vary greatly, and could include black and white composition, landscape composition, or portrait basics. These online photography courses could be beneficial for photographers of nearly any skill level, since these techniques are used by a wide variety of photographers.
When you are comfortable with the basic techniques, you can move on to online photography courses in specialized subjects that interest you, such as nature photography or underwater photography. These courses will help you to develop a natural eye for spectacular photographs in the specialty of your choice.
How Do Online Photography Courses Work?
Participating in online photography courses may be easier than you think. You can either take courses through an online college, or you can go through a company that specializes in online photography courses. The latter choice is great for hobbyists who don’t want to obtain a degree, or for professionals who don’t need to go through basic classes and just want to skip ahead to the courses they do need.
Your online photography courses may be completed through the website holding the course, or you may be sent some files that will detail the techniques being taught. Some courses involve an instructor with whom you can communicate; you send your assignments to the instructor to be evaluated and you receive feedback for each one. Other courses are strictly one-sided; that is, the information is provided to you and you complete the steps at your own pace.
The type of online photography course that you take is entirely up to you. If you work better in a self-paced environment, you may not thrive in an instructor-led course. But if you have trouble understanding things after just reading through them, having an instructor might be helpful so that you can ask questions whenever you are unclear.
Online photography courses can provide you with valuable skills. Whether you are just starting out or trying to expand on your already-sharp skills, there are online photography courses out there for everyone.
Photoshop offers many options for both painting and erasing. While Painter is a natural media painting tool, the painting tools in Photoshop are still an essential part of just about anything you do with this program. Not only can you paint in color, you can also make selections, create transparency and much, much more. Some of the more widely used tools in Photoshop such as the pencil, line, paintbrush, airbrush, eraser, paint bucket, and gradient tools, functions, and their differences.
You can't paint without a brush. Photoshop 5, finds brushes in a floating palette, while Photoshop 6, the brushes palette are attached to the option bar as a drop-down menu. Many brushes are available from the standard to additional ones from the Photoshop CD. The shape, hardness, and spacing of the round brushes can be tailored, and you can also create your own custom brushes from any option that allow you to adjust sizing.The brushes palette menu allows you to reset, save and load brushes. What are some basic brush palette functions? Photoshop 5: If you want to make a new brush without changing an existing brush, choose New Brush from the palette flyout menu. Double clicking on a brush permits you to modify the diameter, hardness, spacing, angle, and roundness while it changes that brush in your brushes palette. To rotate through the brushes in the palette while painting, use the bracket keys [ and ] to cycle through the brushes in your palette. Holding the shift key down while pressing the bracket keys will take you to the first or last brush in the palette. Photoshop 6: When you make adjustments to a brush you can click the preset button to add it to the brushes palette. You can also choose New Brush from the palette flyout menu to make a new custom brush. Clicking on the brush preview in the options bar allows you to change the diameter, hardness, spacing, angle, and roundness. To adjust the brush size on-the-fly while painting, use the bracket keys [ and ]. Holding the shift key down while pressing the bracket keys will adjust the hardness of the brush. Try out the brush options and experiment with them for feel. You can return to the default brushes at any time by choosing reset brushes from the brush palette menu.
Now let's add that color. The most frequently used tools are the paintbrush and the airbrush. Paintbrush is most likely the tool you will be using for most projects. The shortcut key is B. The Paintbrush tool applies color to your project much in the way a conventional paintbrush would paint on paper or canvas. Other options in paintbrush include wet edges that applies paint more in the manner of watercolor paint or markers, a fade option in the options palette that can fade the opacity only in Photoshop 5.x, but can also fade the size and color of brush strokes in version 6 and a paintbrush options palette (Version 5.x) and brush dynamic menu (Version 6.0) are where you would go to make changes to the way Photoshop reacts to stylus pressure if you do not have a pressure sensitive tablet (if you do, you'll want to use your tablet's pressure sensitivity to achieve fading). The airbrush tool works more like a traditional airbrush or spray paint. Its shortcut key is J. The airbrush puts paint on a bit lighter than the paintbrush tool, but when you hold your mouse button down without moving the cursor, the paint builds up just like it would if you were to hold the nozzle down on a can of spray paint. Instead of adjusting the opacity for the airbrush tool, you set the pressure. The higher the pressure is set, the thicker your paint will go on. The airbrush is particularly useful for painting delicate shading and highlights.
There are tools offered more intended for drawing. The pencil tool allows you to apply paint color that always has a hard edge (like drawing in color). The shortcut key for the pencil tool is N in Photoshop 5.x. In Photoshop 6, the tool is shared with the Paintbrush and the shortcut key is B. Shift B toggles between the Paintbrush and Pencil tool. The line tool is used to create straight lines and arrows. In Photoshop 5, the line tool short cut is N and the toolbox location is shared with the Pencil tool. The line width and arrowhead locations can be adjusted through the options palette in Photoshop 5.x. In Photoshop 6, the line tool is shared with the Shapes tool. In the options bar, you can decide whether to create the line as a shape layer, a path, or a filled region.
You can "cheat" and fill areas with color at a time. The Paint Bucket is the simplest of these painting tools, used to fill areas with solid color or patterns and works by filling with color based on color likeness chosen by the tolerance setting. The paint bucket has a blending mode menu and opacity control, just like the layers palette, allowing you to change the way the paint blends with the pixels you are painting on the same layer. The Gradient tool allows you to apply graduated color fills that blend from one color to another. Gradients are not just limited to two-colors. You can create custom gradients using several colors and changeable levels of transparency for unlimited effects. The Gradient tool shortcut is G. In Photoshop 5.x, Shift G toggles the five types of gradient fill types. In Photoshop 6, the gradient fill type is selected from the option bar and Shift G toggles between the gradient and paint bucket tools. There are five types of gradients: Linear, Radial, Angle, Reflected, and Diamond. The transparency checkbox enables gradients with transparency; otherwise the transparent areas are filled with the neighboring color. Reverse flips the order of colors in the gradient. You can also use patterns as paint and fills in Photoshop. In version 5, you need to define a pattern every time you want to use a different one. Defining a pattern is simple, just make a choice and choose Edit > Define Pattern. Anytime a pattern is defined, the tools and commands that required a pattern fill will show that option. When you want to use a different pattern, just select it and choose the define pattern command again. In Photoshop 6, pattern fills are selected from a menu of patterns in the options bar. To add a new patterns you just open the image and choose Edit > Define Pattern. Patterns can be used as fills with the paint bucket and the Edit > Fill command. You can also paint with patterns using the Pattern Stamp tool. This tool shares the toolbox location with the rubber stamp tool. The pattern stamp works like a paintbrush, but instead of solid color paint, it paints with the presently chosen pattern. The aligned check box causes your pattern to line up even if you stop one brushstroke and start a new one. When aligned is unchecked, the starting point of the pattern is reset each time you make a new stroke.
Of course we make mistakes, so let's know how to fix them. The eraser tool shortcut is E. The standard eraser tool has four painting modes to choose from: paintbrush, airbrush, pencil, and block. The eraser tool paints in transparency, unless your layer is a background, in which case, the eraser tool paints with the current background color. The eraser tool options are basically the same as the painting tools, with the addition of one new option: Erase to history. When you erase to history, it works just like the history brush. The Magic Eraser works just like the magic wand, but instead of making a selection, it immediately converts the pixels to transparent. The areas to be erased are controlled by adjusting the tolerance and contiguous options. Clicking once erases all the pixels that fall within the tolerance range. If the magic eraser is used on a background layer, the background is involuntarily promoted to a layer. This tool is best for when you have a background that is mostly one color. One click with the magic eraser and the background is gone. The background eraser also erases to transparency, but instead of using only the tolerance range, it continuously samples the background colors in your document as you erase. It's useful for backgrounds that have a range of colors in the background, but where the background colors are still different from the foreground object you want to isolate. It works best with a moderately large brush. The most important thing to remember with this tool is to be careful to keep the crosshairs away from the object you want to keep. When using this tool, you may notice some bits of the foreground object becoming slightly transparent along the edges. You needn't be terribly concerned with this, because you can always paint those bits back in using the Erase to History option or the History Brush.
There are a few tricks of the trade in Photoshop. Photoshop is programmed to show the painting cursors at the actual brush size. This setting can be changed through your Preferences (under the Edit menu in Photoshop 6; the File menu in Photoshop 5 and earlier.) In most cases you'll want to leave it set to brush size. You can switch to cursors without going through the preferences dialog by locking the caps lock key. Anytime you have a painting tool active, you can press the Alt/Option key to temporarily switch to the Eyedropper and pick up a new foreground color from anywhere in the document. You can alter the pressure of the airbrush tool or the opacity of the other painting tools by pressing the numeric keys on your keyboard instead of going to options. While a painting tool is active you can cycle through the blend modes using Shift -(minus) and Shift (plus). These shortcut keys also rotate through the layer blend modes when non-painting tools are active All the painting tools have the capacity to be faded using the Fade command. In Photoshop 5.x, this command is under the Filter menu. In Photoshop 6.x, it was moved to the Edit menu. After using any paint stroke, fill, or filter, you can select this command to fade it back so it blends with the original pixels. You can also use it to apply a blend mode if you forgot to set the blend mode before applying paint. Now with a little practice, you'll be an expert in no time.
Make no bones about it the digital cameras of today are far more easy to operate than the old school traditional film cameras. This does not mean, however, that these cameras are without their complexities. Additionally, there may be some added complexities associated with indoor digital photography, a type of photography that is often considered more simplistic than exterior shooting. Well, while it is true that exterior shooting can be somewhat complicated its complexities do not exist at the exclusion of complexities associated with interior shoots. While there are a number of tips for improving one’s picture taking, here the two most common impediments to solid picture taking will be examined.
Light and Shadows
Is it a trick of light and shadows? This was the question asked on the old commercial for the infamous Face on Mars videotape. While no one will be shooting photographs of the landscape of the Red Planet from their living room, when one takes part in indoor digital photography there will still be concerns about light and shadows. After all, poor light will kill the quality of photographs greater than anything else. Of course, a solid flash will eliminate any problems with light exposure but it is also striking to note that there is also flashless digital cameras as well that are quite reliable. Either way, paying attention to the light conditions for a camera will always be of paramount importance for indoor digital photography.
The Benefits of a Tripod
Believe it or not, when it comes to digital indoor photography many people do not take into consideration the value of a tripod. Often, people will assume that a tripod is necessary for outdoor shoots due to the commonly uneven ground of an exterior, but the relatively even surface of an interior shoot makes the need for a tripod unnecessary. To put it mildly, such logic really doesn’t add up! There are many reasons why this notion is wildly lacking in logic, but the main reason would be that without a tripod there will be a need to hold your camera steady exclusively by hand. Needless to say, this can be problematic at times and can often ruin a shot. So, if you want to make sure you digital indoor photography is solid then it may be best to stick with a tripod.
Again, while there are a number of areas to take into consideration regarding this type of photography paying attention to light and using a tripod will eliminate 90% of the most common problems associated with snapping pictures. It is as simple as that.
One of the easiest ways of making extra money is with a camera. More people own cameras than radios, and photography is the fastest growing hobby in the world. Yet using a camera as an extra income tool is largely overlooked!
With a little imagination, a flair for showmanship, and just a hint of salesmanship, the average man or woman, or even teenager, can easily make an extra $300 a week with his camera.You don't have to have one of the popular, more expensive cameras either, or a loot of high priced attachments and equipment. In many instances, a Polaroid or other "off-the-wall" camera will suit the purposes perfectly. The only special piece of extra equipment you may want to invest in would be a tripod for mounting the camera in certain situations. One of the easiest ideas is to visit a children's clothing store in one of your busy shopping centers, or the children's department in one of your large department stores. Sell the manager or store owner on the idea of your setting up in a corner of the store or department, and taking pictures of the shoppers' children. He can promote the fact that you'll be in the store taking pictures for special prices during certain hours - perhaps on Friday evenings and all day Saturdays - in his advertising, thus drawing patrons into his store because of you.
You'll need a sheet or a plain piece of material, or some sort of imaginative set for a background. But this you can easily make or build yourself. You should also have an eye-catching poster that calls attention to what you're doing and the prices you're charging. Unless you're a commercial artist, spend the money to have this sign made for you by a professional. The next and last thing you'll need will be a 2-part receipt or coupon. This can be a simple piece of paper about 2" wide by 5" long. On the left side draw lines for your customers to fill in their name, telephone number and address. You might also want to include space for additional information such as the child's name and age and the number of children in the family, for future efforts, but keep it brief and simple. On the right hand side of this coupon, have your business name, address and telephone number, plus a quick outline of the different kinds of photography work you handle, and perhaps a business slogan such as "Satisfaction Guaranteed or You Don't Pay." To add a little bit of class to this coupon, take the basic outline of this idea over to an instant print shop. Tell them what you want; show them your outline; and have them typeset everything. Then put a fancy border around the whole coup on and have it printed on colored paper. The best color of paper is a "dollar bill" shade of green. If you want to give it even more class, you could have it printed on green, lightweight card stock. You'll want to divide the "information" side o f this coupon from the "business card" side with a dotted line and perforations. If you layout this coupon properly. You should be able to get six of them on an 8 1/2 x 11 sheet of paper or card stock. This means the printer can print and cut 6,000 of them for about the same cost as printing 1,000 circulars or flyers. On your printing, shop around for the best deal, but in the end, it shouldn't cost you more than about $60 for all 6,000 coupons which will come from those 1,000 sheets of paper or card stock.
Now, when you take a person's picture, regardless of whether it's an "in-store" set-up, out on the golf course, or along the street, you give your customer one of your coupon-receipts and tell them their prints will be ready in a couple of days. They fill in the information part of the coupon and give it back to you, retaining your "business card" portion of it.When the prints are ready, you can phone the customer and remind him - volunteer to deliver and collect; send them through mail with a bill; or make arrangements with a store to take care of them until the people call for them and pay at that time. Most stores, golf courses, bowling centers, and other retail merchants will be glad to handle this part of it for you, because it brings the customers back into the places of business, and provides another sales opportunity for them. By all means, be sure to include an advertising circular with each set of pictures you deliver. This circular should explain how the customer can get more prints, how he can get enlargements of his favorites, and details relating to all the other photography services you offer.
Back to the original "in-store" picture taking set-up during evening shopping hours and on weekends for extra income. You can call attention to your "in-store" set-up and bring in more business with a few merchandising promotional ideas. In the following paragraphs we give the highlights of a few ideas that have worked well, how evþer, you should keep your eyes open to observe additional promotional ideas that could be adapted to fit your new business. Dress a helper in a clown suit, and take pictures of the kids on his lap or with his arm around the kids. Put a sandwich advertising board on a helper and let him stroll through the shopping center advertising the fact that you're in Kiddie Clothing store taking pictures.
Promote a "Baby of the Year" contest where you take pictures of babies, display the pictures on a "show board" and offer $100 cash plus a merchandise prize in a big drawing at the end of the year. Set up a booth in the mall and promote "Instant Snapshots." Be a Roving Photographer and take candid shots of shoppers and promote a "Shopper of the Year" contest. Work with a clown and have him "attach himself" to the kids, and ask if they'd like to have their pictures taken with him. Build an inexpensive and portable set, such as an air plane, a race car, bucking bronco, hand-shaking scene with a famous person or "balloon figures" and take pictures of people standing in or on these sets.
Get out to the golf course and take pictures of the golfers teeing off. Get over to the bowling centers and take candid shots of the bowlers in action. Do the same thing wherever there's a sports event taking place. Be on the spot and ready whenever there's an opportunity to take team pictures. You might follow, or hire someone else to follow a Little League team through its season, take candid and action shots. You then arrange the best of these pictures in a photo album with the team's name and year on the front. You should be able to sell one of these albums to each member of the team.
There's also the idea of "just strolling through the park" on a Sunday afternoon. You take candid and interesting pictures of couples, children and people in general spending time with their relatives. Keep tabs on the announcements of new births. Send advertising literature to the new mothers, and follow up with phone calls efforts to set up photography sessions. Keep tabs on the engagement notices in the weekend papers. Send your sales literature to the brides-to-be, and follow up with phone call efforts to take the wedding pictures. Set up household and business photo inventory service. With this idea, you contact the insurance companies and determine if they will approve and endorse photographs you take of their policy holders' household, personal and business property in loss claims.
Most will, and from there - working either with the help of an insurance agent, the agency itself, or on your own - contact owners of property and sell them on the idea of your taking pictures of the household goods they have insured. You take pictures - a pictorial inventory of everything they're claiming or would like to claim on an insurance policy - and then identify the pictures, giving one set to the property owner and the other set to his insurance agent or company. Picture inventories of household and personal property is still a new thing, but everywhere it's been introduced, it's definitely proven to be a super money-maker for the people willing to get out and hustle. If this idea arouses your interest, you might want to check into a online photography service,that specializes in helping you sell some of your best photography photos online, this offers photographers a quick and easy way to start earning some quick cash. Once you decide that using your camera to generate extra income is what you're going to do, get out and use your camera, start taking pictures, and allow yourself the opportunity to build. Give yourself the chance, and you'll quickly begin to think of hundreds of ideas for taking pictures, merchandising ideas for promoting your services, and sales angles for increasing your profits.
The important thing is to get started, regardless of how small your start, and begin chasing in on an idea that's still in its infancy. This is an idea that can produce new concepts for profit every day of the week. An idea that can be fun, as well as financially rewarding for you! You've got the idea and the plan - the rest is up to you. You've got the ball; now run with it!
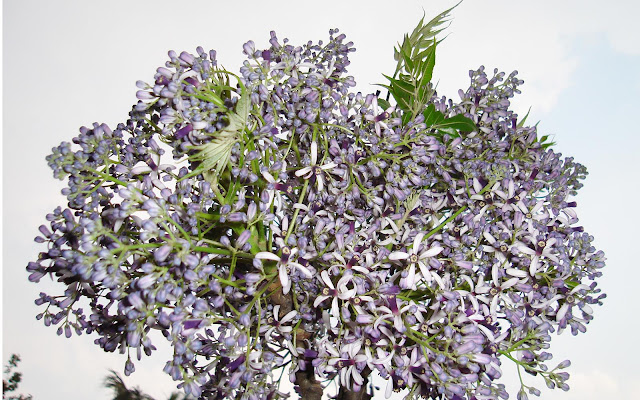
Many people enjoy taking photos as a hobby, but we can always learn something new from the photos we take. Luckily if you have access to the Internet you will soon find that there are plenty of websites that include a digital photography tutorial section on them for you to browse through.
What Exactly Is A Digital Photography Tutorial?
A digital photography tutorial is basically a lesson in how to do something better when taking photographs, usually of a certain type. For example, you might see a digital photography tutorial that is all about which viewpoint to take when shooting your photos. Another one might be about taking photos of people as opposed to still life objects.
As you can see, there are a lot of benefits to reading through a digital photography tutorial, not least of which you can select the one which would appeal to you the most, and would be most useful to you at this specific moment in time. As and when you start to learn more about taking photos, and there are different areas and techniques that you want to learn about, so you can look up another digital photography tutorial to help you with the next area you want advice on.
Look Out For Professional Photographers’ Websites
This is definitely worth doing because not only do their sites promote their work, they also very often include advice and techniques for new photographers to make use of. If there is a particular digital photography tutorial that you want to find, you should perform a search on Google or Yahoo for that particular search term, so that you can find exactly what you want as easily as possible. When you find a good site or a particular photographer that you like and whose advice appeals to you, make sure you bookmark the website so that you can return to it whenever you want to read a digital photography tutorial on a brand new subject.
As you can see, this can be a great way of learning new things and expanding what you can do with your camera. The next time you go on vacation you might find everything you have learned will result in far better pictures to bring home and show everyone else. You will also get more enjoyment out of your camera with every new digital photography tutorial you take, since you are learning more about how to use it to your best advantage. So go on, get snapping!
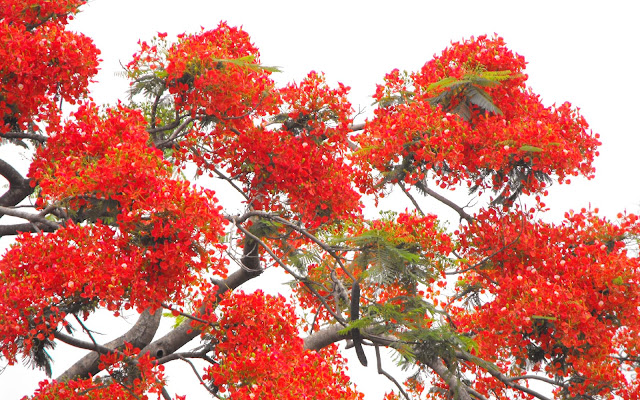
Because the Clone Stamp's function is to subtly replace one area of pixels with another, you don't need its brush tip to be shaped like a rubber duck, for example! However you can use the Brush Preset picker to arm yourself with a variety of creatively-shaped brushes, should your project require them. Working smarter with the Brush Preset picker means maximising its potential. If you're not already familiar with this interface.
Making custom brushes is one of the easiest things in the world. Seriously! I don't know why I've read some tutorials that make it out to be this multi-step, intimidating process. Creating your own brushes helps to customize both your artwork and the Photoshop work environment. The Hard Part: "But ... you said this would be easy!!" Technically, yes, but I've found that some people actually reach a little stumbling block when trying to think of what would make a good brush. Well, the short answer is ANYTHING! I've made brushes out of fuzzy leopard slippers, bananas, old trash cans, fabric swatches, dirt ... hundreds of things. It helps to have a scanner and/or a digital camera ... that really opens up your possibilities. Just a quick walk around your house might yield dozens of fun textures you can make brushes out of. But, even if you don't have either of those, you can often snurch some good textures off the internet. Try a google search for marble tile and see what comes up. Sometimes you'll get a nice big image to work with. I'm not condoning stealing someone's art photos to rip a brush off with, but if it's just a sample photo of tile, or fabric, or screen, or whatever, I think it's perfectly fine ... you'll be drastically changing the image in the next steps anyway.
Whatever you're trying to do in Photoshop, then, the chances are that your starting point will be either the toolbox or the menus. While the toolbox contains everyday tools such as selecting, filling and making shapes, the menus have more complicated functions like blurring, sharpening, and all the other effects Photoshop can achieve (mostly to be found under the Filter menu). When you have selected a tool from the toolbox, you can alter its settings using the toolbar - options from the menu will generally open a dialog box. Finally, when you want to go back and alter something that you already put on the image, you can use the palettes, although they have some other uses too, notably changing colors.
The problem with many of these applications is that they use pre designed templates which the user pieces together to form logos that really are not that original and sometimes appear a little generic. While these applications allow the user to quickly begin creating graphic designs and logos they often simply do not produce designs that are original and in demand by web design clients. If you take the time to learn adobe Photoshop there will be no limit to the logos and graphic designs you can put together. Although the interface can seem a little overwhelming at first, learning Photoshop is not difficult if you have the right tools and take the time to practice.
Do you have old photographs that are faded, worn out, crinkled or even torn? Of course you do, everyone does. Many of these photos are likely very old family photographs that are simply irreplaceable should something happen to them. In the past it was very expensive and time consuming to have old damaged photographed restored. It usually required a photo restoration expert and sometimes the results were not really that great. Digital imaging, and more specifically Adobe Photoshop, has revolutionized the process of renewing and restoring old photographs. It is amazing the results you can achieve with Photoshop. Old and damaged, even torn, photographs can be restored and renewed to their original colors and vitality using the tools available in Photoshop.
The Caledonian Digital website is user friendly and offers extensive information relating to the services provided, as well as providing recent articles on various aspects of digital photography, and links to sources of hardware, software, and reference material for photo restoration enthusiasts.For additional information on the launch of Caledonian Digital's new hassle free photo restoration and enhancement service contact Charlie Templeton or visit www.caledoniandigital.co.uk.
The tools we use in Photoshop are levels, curves and saturation for changing contrasts; and, color balance to bring the image back to the way the natural eye would see the color. Here is what we tell our photographers in the Handbook of Reuters Journalism... Photoshop is a highly sophisticated image manipulation programme. We use only a tiny part of its potential capability to format our pictures, crop and size them and balance the tone and colour. For us it is a presentational tool.The rules are - no additions or deletions, no misleading the viewer by manipulation of the tonal and colour balance to disguise elements of an image or to change the context. Photoshop is a powerful image processing program with many more tools to help photographers produce the best quality image they can for the type of photography they do.
Why is a 3 megapixel camera better than a 1 megapixel camera? It really depends on how you intend to reproduce the picture. The reason cameras produce pictures at 72 pixels per inch is that this format is standard in video uses such as television and DVD. So there is no noticeable difference in quality when viewing pictures on a TV or DVD. The difference appears when you are cropping and/or printing these pictures. If you are not familiar with the term cropping, I will explain it later. But first let's talk about printing.
Even the most inexpensive of printers these days are capable of printing at 300 dots per inch (dpi). Most are capable of printing at 600 dpi and you can buy relatively affordable printers that print at 1200 dpi and above. You may have noticed that with cameras it's called pixels per inch and with printers it is call dots per inch. The terms are hardware specific, but relate to the same principal. A printer prints a specific number of dots of ink per inch on the paper whereas a TV displays a specific number of pixels per inch on the screen. In either case, combining the dots or pixels creates the picture.
So how does this affect quality? If we're printing a picture that has 72 pixels per inch from a 1-megapixel camera on 4x3 printer paper we've got a problem. (Here is where I have to crunch some numbers, so please bear with me.) Let's figure it out. Four inches times 72 pixels (dots) per inch equals 288 pixels (dots) on the vertical line. Three inches times 72 pixels (dots) equals 216 pixels (dots) on the horizontal line. The total picture would have 288 times 216 or 62,208 pixels. That's way short of one million.So where did the other pixels go? If you're printing this picture at a store or camera shop that has conversion capabilities, the machine that you are printing on actually crunches the picture down for you. The size of the picture taken by a 1-megapixel camera is approximately 16 inches x12 inches. (16x72=1152 and 12x72=864 and 864x1152=995,328 pixels). The machine makes this picture into a 4x3 by increasing the number of pixels per inch. The 4x3 picture is 1/4th the size of the 16x12 so there has to be four times as many pixels per inch to reduce this picture to 4x3. Four times seventy two equals two hundred eighty eight pixels (dots) per inch. With more pixels or dots per inch, the picture can be reproduced at a higher quality level making details sharper and more distinct. So a 1-megapixel camera can produce a reasonably good quality 4x3 inch picture on a 300 dpi printer. That's what most amateur photographers get with their snapshot cameras. If you try to get larger pictures, then the picture quality begins to deteriorate. Part 2-2 will deal with larger prints.
Conclusion: If you have a printer with more than 300 dpi capabilities and all you want is 4x3 inch prints, then you are not using all your printer's abilities. If you want prints larger than 4x3 inch, then you need a camera with a higher quality output capability. If all you want is 4x3 inch prints and video reproduction without cropping much, then a 1-megapixel camera and 300 dpi printer should serve you fine.
Note: Different printers produce different quality prints. Since this is a discussion of pixels and digital cameras, I do not get into choosing printers for the quality. Suffice it to say, if you have a reasonably good quality printer, then the information provided should work for you.
Note 2: There are ways to enlarge prints with lower dpi rates and size and still get quality results. This information will come in later discussions and is probably geared toward the more advanced photographers and digital dark room users.
Most digital cameras today boast of greater resolution and picture quality. What does that mean to the amateur or occasional photographer? You hear of cameras with 3 megapixals up to 6 or 7 megapixals. What is that? The book that comes with the camera explains all the buttons, bells and whistles, but does not explain megapixels. Most people do not like to work with numbers much, but it is necessary to understand pixels. So here's my attempt to explain pixels. I'll try not to involve too many numbers.
To understand pixels, one must first remember the good old days when you took pictures on film and let the development labs worry about pixels. But, they didn't really have to, because the exposed negative just captured the image that was reflected through the lens. It was all there and the only thing that affected quality was the size of the negative. The bigger the negative was, the larger the picture that could be produced. When the world went digital, the pixel was invented. So what is a pixel? If you divided a picture in hundreds of horizontal and vertical lines, you would actually have a large number of little squares that when put together, created the picture. Each square is a pixel. So, when a digital camera says it has 1-megapixel capabilities, it means that the total number of horizontal and vertical squares produced when a picture is taken equals 1 megapixel (1,000,000 pixels).
A 3 megapixel camera produces a picture that has 3 million pixels in its makeup. If all the pictures were the same size in each camera, it would be easy to understand why a camera that produces more pixels would be a better quality camera. Here is where the camera makers are not forthcoming with information. What they don't tell you is that as far as I can tell, every digital camera produces pictures that have 72 pixels per inch per picture both horizontal and vertical. The only difference is that a 3 megapixel camera produces a larger picture than a 1 megapixel camera and a 5 megapixel camera produces an even larger picture yet. The reason I say "as far as I can tell" is that I have not tried all cameras or studied the information on all cameras. There may be some out there different, but they probably are not in the amateur photographer's price range.
Conclusion: For video uses only, your camera purchase decision should be based on features other than the number of pixels.
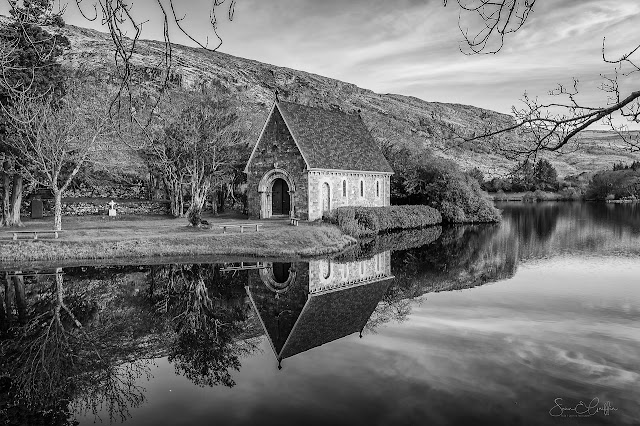
Many people mistakenly think that black and white digital photography is difficult, but it really doesn’t have to be. There are just some differences between the basic color and black and white digital photography that you will need to understand, and which will be discussed here
Shooting Tips
Here are a few tips that will help when you are shooting black and white digital photography. The first is to shoot in RAW. This is basically the counterpart to JPEG that you are most likely used to, but which will give you the most control in the post production phase of converting your color photographs into black and white.
Using a low ISO is also very important, and shooting with the lowest ISO possible is one of the best things you can do. It is also very important to learn when to shoot, because usually novice photographers find themselves shooting a million pictures a minute, hoping that one of them will turn out.
It is much better to take your time, know what you are doing, and produce that single, top quality picture. A dark or overcast day can be a great time to shoot outdoor shots especially if you are going for a black and white photograph, because the sun will not be glaring in the lens and it will turn out a lot more dramatic.
Composition is another very important feature here, especially for black and white digital photography. The main difference with composition when it comes to black and white digital photography is that you are unable to use color to lead the eye into or around your shoot.
Find The Right Camera
If you want to shoot in black and white, it is very important to choose the right camera for your needs. You need to find a camera that is going to offer all the features and components that you are looking for, and one that you are going to feel comfortable using.
Of course price is also an important factor here, as you want to spend enough to get a good quality camera but at the same time should not go too far over your budget where you are spending a fortune and going to be broke.Cameras range significantly in price from modestly cheap up to thousands of dollars. Make sure that you find one you know is good quality and which will produce good photographs, but which is not too expensive for you to comfortably pay for. A high quality camera can only enhance any black and white digital photography.
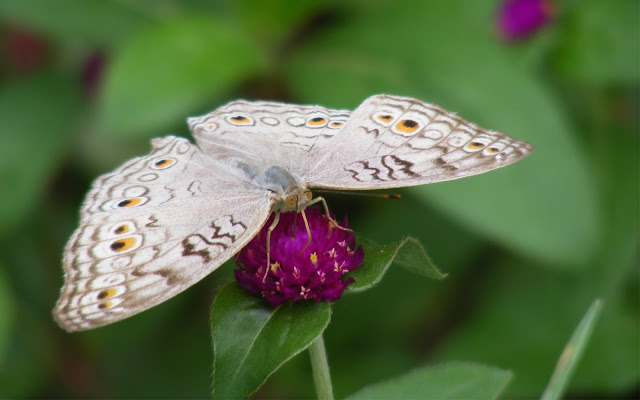
There are times that people may have old photographs they would like to restore to save the memories. Photos usually get damaged through the times. The pictures may get blurred, the color fades and the picture might acquire marks and scratches. Thank the technology of today. People can now save and restore their old photos with the help of Photoshop.
An easy to learn program is Photoshop Elements. This program contains options that can help restore your old photographs. One of these elements is the Dust and Scratch Filter which can be used to remove the marks, scratches and blots on your old photos. The Dust and Scratch Filter can be found on the Menu Bar and then clicking on the Filter Tab. A drop down menu will list your choices at which point you can choose the Noise tab and click on the Dust and Scratches.
After clicking on the Dust and Scratches menu, a window will pop up with two control sliders. The first slider is for the Radius and the other one is for the Threshold. There will also be another window if the preview box will be checked. These are the main options that will be used in treating the picture.
To remove scratches you will want to use the Radius slider. Too much adjustment can result in the edges blurring so please be careful with how much you adjust. If blurring occurs you can adjust the Threshold slider to allow the details to return and make the photograph clearer with the scratches disappearing. Again, you want to be careful not to set them too far or it will create blotches on the picture.
In removing the marks, selecting the whole photo will not diffuse these marks. The option is to select only the part where the scratches are located. He may use the Lasso to do this.
Once you have fixed some of these problems you can use the feathering tool to blend the edges of the selected area so that the manipulated area will not be obvious on the photograph. The feathering tool is located under the Feather option. You will want to repeat the process of adjusting the Radius and Threshold sliders to get the texture needed and remove all the scratches from the photograph.
To finish the process and make the photograph appear professional I recommend you crop the image enough to remove any cracks or torn edges of the photograph. The canvas may be use to equally crop the image.
You can also add drama to the picture by adding a drop shadow. Drop shadows make the picture appear as if it has been lifted off the page. You can also remove color using the controls Shift+Ctrl+U. You can then add color by putting a little amount of Sepia by using the Hue or Saturation tab. The contrast may be adjusted using the Levels option.
These steps are a relatively simple way to remove any blotches or marks on an old photograph. These steps are also a good way to make a photograph appear new but still look classical. Your family and friends will marvel at your ability and talent as well as enjoy the photograph again.
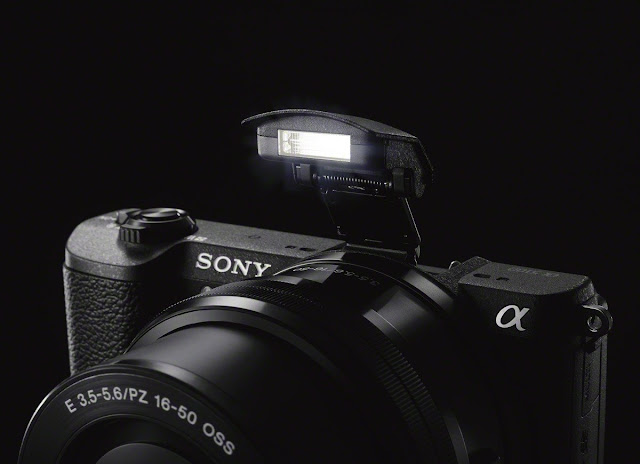
To make shooting self-portraits selfie the α5100’s tiltable LCD screen flips up 180 degrees. If your looking for something between a little point & shoot camera and a professional level camera The Sony a5100 Interchangeable Lens Camera with 16-50mm Lens is best for you.
Price: $548.00
Sony a5100 price in bangladesh: Tk. 105,000.00
Quick view of Configuration
- Ultra-fast auto focus with 179 AF points and 6Fps
- Capture life in high resolution with 24MP APS-C sensor
- Instant sharing via smartphone with Wi-Fi® and NFC1
- Record Full HD 1080/24/60P video3 up to 50MB/s
- Contains- Rechargeable Battery (NP-FW50) AC Charger (AC-UB10) Lens cap Shoulder strap Micro USB cable
Quick view of Technology
- To Take Photos of Fast Moving Subject its have an Ultra-fast and accurate auto focus with 179 AF points and 6Fps
- Capture ultimate image quality and light sensitivity with high resolution 24MP APS-C sensor
- Wi-Fi connectivity allows you to control Instant sharing via smartphone
- Amazing camera for video recording, Record Full HD 1080/24/60P video up to 50MB/s
- The α5100 is a best lightweight camera and it's quality in half the size & weight of other DSLRs
- For taking better low light pictures you can esely play with α5100 from the features ISO range of 100-25600 and a pop-up flash.
Additional Features
- Take better selfie with flip-up touch-screen LCD
- Personalize your camera and creativity with PlayMemories Camera Apps
- Take Great Pictures with Built-in pop-up flash when an extra burst of light is needed to get the shot
- Easy one hand use with convenient power zoom lever
My nephew made the leap and finally bought Photoshop. He had been saving up for a while now, and believed it would make his life a lot easier. He saw a future where he would make top quality images by merely thinking about it. Just close your eyes hard enough and 'poof', it was done. Then he sat down to use Photoshop, and realised he had no idea what to do!
Just as with any piece of software or tool, you will need to explore what exactly is at your finger tips. We sometimes call this "playing" ... so my advice is to play with your Photoshop extensively. Check out the 'preferences' in Photoshop. Your goal is to increase the performance of your Photoshop. So open up your "Preferences" window. The color picker chooses the algorithm that will be used. Most users will choose between Windows and Adobe. The 'Image Interpolation' is used to decide which algorithm Photoshop will use when resizing an image. The 'Bicubic Interpolation' is generally a good choice for most people.
The color algorithm that the program uses is decided by the color picker. Most user selct Adobe or Windows. The algorithm for resizing an image is choosen by the 'Image Interpolation'. Again, most people will use the 'Bicubic Interpolation'.
Next you will notice the "History Log". This allows you to save all the steps you used in the creation of an image. Here you have some choices ... you can either record the start time and date of every editing session with the "Sessions Only" selection. The "Concise" selection records details on every editing session on the file. The other option is the "Detailed", which records the same information as in the 'Concise' selection ... plus information such as the path of the file and an account of every edit made to the file.
These brief examples can point you in the right direction, but the best way to learn about Photoshop is to experiment and try things out for yourself. Play around with all Photoshop's features and discover great new ways to alter your image. To learn in more detail you can read about Photoshop or take an online video tutorial which will show you the step-by-step process for achieving a specific effect. If you keep at it, you'll be making those top quality pictures in no time!
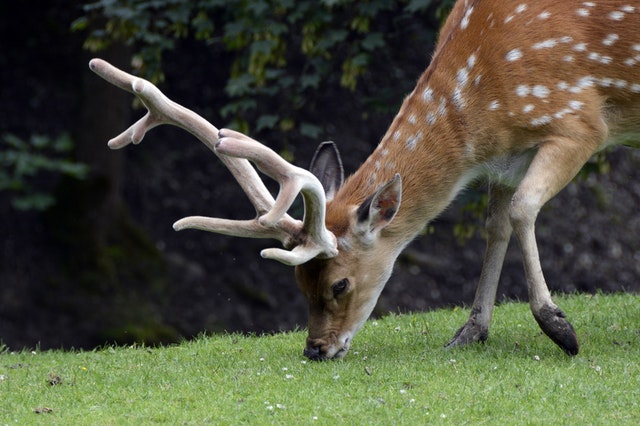
Before starting nature photography, you need to have the correct lens for your camera in order to take close up pictures. Most cameras do a fine job of taking landscape photography because everything is in focus. However, if you plan on photographing wild animals you may need a zoom lens to shoot from a distance. You will probably not be able to get as close to the animals as you would like without scaring it off.
Macro photography
On the other hand, is the photographing of small objects usually shot very close up. Things such as shells, insects, and small flowers are great subjects for macro photography. Some cameras have a built-in setting that allows them to take very good pictures close up. To get the best results though, you'll need special lenses to take close-up shots. With the right tools, macro photography can be very beautiful and very rewarding.
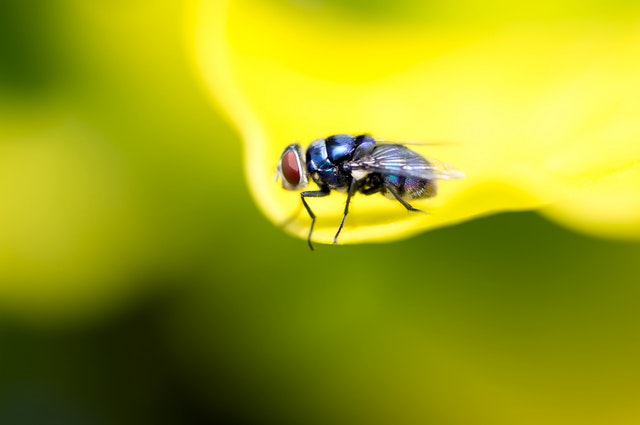
Macro photography requires more patience, especially when photographing small animals or insects that won't stay still. Just remember, patience and persistence does pay off. The wind can play a role in the quality of your photos when photographing outdoors. This is because of the fact that you're zoomed in so close. Even very small movements will be exaggerated causing your picture to be blurred.
To compensate for this extra movement, you can purchase various accessories for your camera to help stabilize the flowers or plants especially in windier conditions. They usually clip onto the tripod and then gently hold your subject in position.
To compose a great nature photograph, you must begin by selecting a subject. Do you find beauty in the sun shining through a leaf or do close-ups of insects make you happy?
If you choose to photograph animals, you must wait until one comes along that you can photograph.
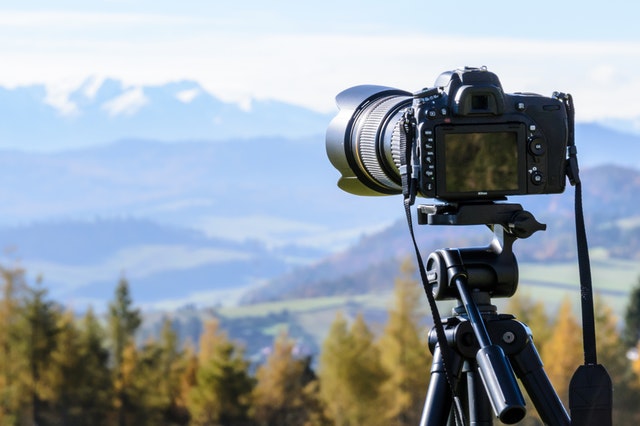
To compose the best picture, use a tripod or lean on something steady and still. A crooked picture will show a lack of experience and a straight picture will make the photo look more professional. Even if it is on a tripod, make sure the camera is level.
Some tripods come with a bubble level or you can purchase one separately that fits on your camera. This will assist you in leveling your tripod and improve the quality of your photographs. After checking this, you can begin taking pictures.Once you have played around with your camera a bit, try to take a nature picture that shows a feeling such as joy or serenity. You might view the bright sun reflecting off of a window as joy. You may see the sun melting on top of the ocean as peaceful and serene.
Try different lighting options or color filters to give your photo a different personality or capture an emotion of the scene. Practice with your camera enough and you will think to yourself, "Wow! I can't believe that I took that picture!" Once you get even better, you can sell your photography, make large prints to hang on your wall or put your photos on a card, mug, pillow, etc. You will be rewarded with a smile and admiration from friends, family, and all viewers.

With outdoor photography you can share the beauty of the wilderness with your friends and family. The first and most important rule when taking pictures of wild animals is to be patient! Good pictures require lots of it so make sure you move slowly and don't scare the animals away. Keep far enough away to stay unnoticed, but close enough to get the good shots.
It's important to remember that small animals will look small in a picture, unless you take the picture closer to ground level or the same level as the animal. This will make them appear bigger. You may need a zoom lens for this type of a photograph. This is probably something you will want to consider when purchasing a camera.
Even if you don't get any good pictures on the first day, don't be discouraged. There will always be another opportunity to take a good picture. Also, don't get too close to large wildlife, since they are big and can be photographed easily.
Always be prepared since the right opportunity for that awesome shot can be there one second and gone the next. Be sure to capture the eyes of the animals that way it looks more like a portrait than a snapshot. This will make for a great photo.
Natural lighting is another important factor in outdoor photography. Depending on the time of year and time of day, your lighting will vary. The time of day, such as sunrise or sunset can give your photo a different personality and feeling because the angle of the sun will cast a different shadow.
You may have to use a fill flash to decrease the amount of shadows in the picture. The time of year also has some bearing on the lighting. The worst time of day to take pictures is mid-day, since the sun is directly overhead. The use of flash and help offset the harsh shadows the sun creates, especially in the middle of the day.The best way to ensure photo brilliance is to use a tripod. It will bring out the best in your subjects and the lenses you buy. Find a sturdy, rigid tripod, as this will create the best images with the sharpest focus.
Make sure to keep your lens clean since sand or dust can create specks on all of your photos. If there is sand on your lens, you may not want to try cleaning it yourself. See a professional because if you scratch your lens, you will have to buy a replacement or else have scratches in all of your pictures, which is no good.
After you download your images to your computer, you can use a photo editing program to tweak or enhance your already beautiful photograph.
Make money as a photographer? Here are a few ways to do that
So, you want to make some extra cash with your camera. But the question is how to start. You are in the right place. Here I tried to give detailed information about Secrets of make money with photography.
A picture is helpful in revealing a fact or a beauty. To illustrate a subject, it is not possible to write an article of many words, but it is possible to present the details of your content with a picture. Can you imagine a day without media? Of course not! it is not possible to imagine anything without media today. And the picture is a common issue in every case of the media. From the print media to TV channels, movies, social media, even in a personal and social life, such as marriage, birthdays and other events the presence of the camera can be seen almost everywhere. And the camera operator who is called a photographer is so much more demanding, so the photographer's workplace is quite extensive.Before start ask yourself
- Do you have a decent digital camera?
- Can you take photos that make a strong statement about the subject?
- Do you want to earn with photography?
If all answers are true, then the article will help you to reach your goal
There is no shortage of cameras in the market and people behind the camera. So if you learn to shoot good photography, then the good photographer's position is absolutely ripe. You can earn yourself by making a portfolio or freelancing. On the other hand, you are just a travel-crazy man and you have a digital camera, which gives you some spectacular pictures at the time of travel, with love or a hobby, you capture some pictures every day in your camera. Every day everywhere you go with your camera and take some cool snap, it gives you joy but does not pay any money. Be glad to know that you can also convert these pictures to money. You can sell your stock photos without any training, even without a personal website.
You Need a decent Digital Camera
There is no substitute for a good digital camera for taking pictures. You may be able to take good and beautiful pictures with expensive smartphones nowadays, but it is not enough to make money. On the other hand, in order to make money do not need an expensive camera. In the beginning you can choose one of these cameras that are priced at a low price for you. Canon EOS Rebel T5 or Canon Eos Rebel T6.
The image is a matter that occupies the largest part of the Internet world, and its needs are not ending. Every day, new websites are being created on different topics, and the beauty of a website is a picture, and that's why its demand will never end. Using your photography hobby is not very hard to earn from the internet. It can be used as an alternative to the profession and many people do it.
Take photos that make a strong statement about the subject
A simple picture that does not attract people will not give you money. A picture that you want to convert to money should be interesting and make a strong statement about the subject. You can read this awesome article to know details processes or procedures how to get a good picture.
How to earn money as a photographer
There is a lot of ways for earning money as a photographer that cannot be explained in a single article. Many online designers have been looking for pictures for their projects, and from different types of designs to industrial value, people also buy photos.
Many small companies or webmasters want to use their photos as advertisements, magazines, posters, videos or website content. But many times it cannot be taken as pictures of mind, but at the same time, someone has given such a picture online. But the problem is the permission to use the pictures taken from others. So in this case, Royalty Free Image can be used by anyone who can buy and purchase pictures and use them for their needs. So there's a lot of demand. In this case, many small companies, webmasters, personalities, newspapers etc. are buying these pictures. And when they are selling pictures they get permission to use this picture. A lot of photographers work around us. Each job field is different.
List of careers in photography
- Earn as a portrait photographer
- Make money as a Photojournalist
- Make money with photography Blog
- Graphic design photography
- Revenue by selling pictures on the Internet
- Earn money as a freelance photographer
There are much more areas to build a career in photography. For making money, you can do photography on the following topics Such as: Fashion, Advertising, Landscape, Wildlife, Family, Baby, Food, Vehicle, sports, Pet, Event, Real Estate and Architecture, Photojournalist, Concert, Medical, Travel, Street, Nude/erotic, Stock Photo, Wedding Photography, Documentary etc.
Let's talk about the topics - careers in photography- mentioned above
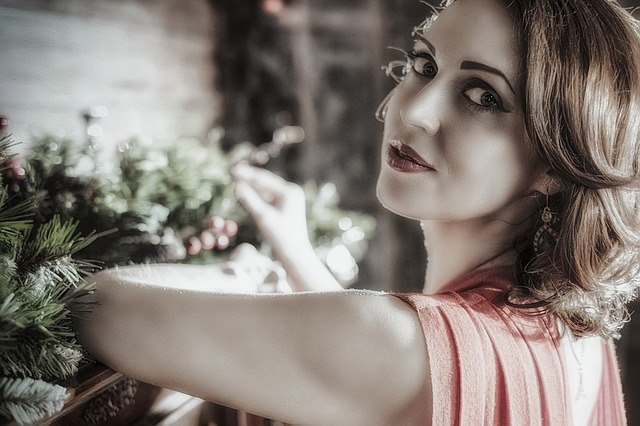
Earn as a portrait photographer
Portrait photography is a photograph of a person or group of people that capture the personality of the subject. People make Portraits for many purposes such as use on a personal Web site or display in the lobby of a business and many other business purposes. Even Many people also create portraits for social media profile pictures.
For making money you can take pictures locally with a studio or a person calls in his own place. Here you can learn more about Portrait photography.
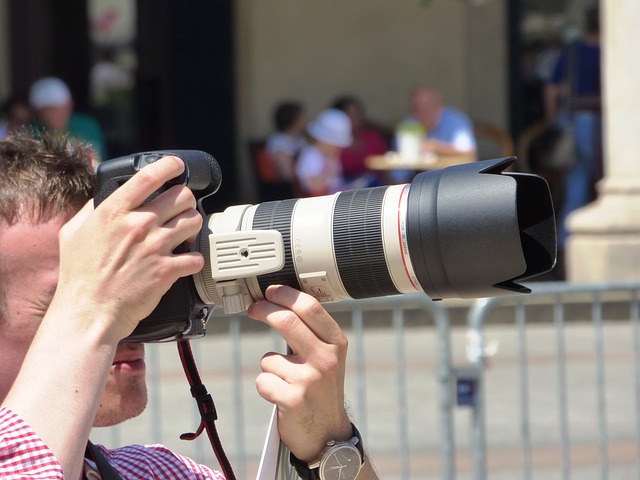
Make money as a photojournalist
A creative and skilled photographer has a lot of workplaces. A photojournalist captures and displays images in order to tell a visual story. If you have intellectual brains to decide in the moment and get used to the cameras at the moment's notice then the photojournalism may be your career. Many are financially well-off by taking photojournalism as a profession. There is work opportunity for a photojournalist print media, electronic media, news agency, and photo agency. Photographer's income from different sectors is different and the salary is different for the different country. Based on experience and expertise in the US, a photojournalist's salary is $ 26,381 - $ 58,789. You can take an idea of your country's photojournalist's income by Google.

Photography Income with Blog
It is possible to earn money by creating a photography blog that will create many areas for more income for you. If you can create a popular photo blog and good traffic, then you do not have to worry about ways to make money. The pictures published in a photo blog can be an example of your photography skills that can bring you more new work opportunities.
Suppose a person is searching for a good photographer for a project. He searched your blog by searching the Internet, where there is a sample of work that he liked. Then he will contact you for his work and you will get a new job. This is a common example. There are also several ways to earn from a photo blog, for example...
Google AdSense in your blog
Google AdSense is another way of earning a photography blog. Google AdSense has the ability to provide all types of ads, including text-based ads, video ads, link units, and display ads. Google Adsense generally advertises ads that are relevant to the content of a blog or website. If your photos are accompanied by some text, you can place text-based ads.
Suppose you have published a few tips on taking good pictures on your blog. A visitor searched Google for a better photo shoot and came to your blog and found some ideas that helped to develop his photography knowledge. As well as the advertisements of Google Adsense appearing on your blog, which attracts users and takes them to the advertiser's website and that's why Google paid you.
Earn with In-image ads
You can use In-image-ads for photography blogs. Those who do not know about In-image ads, they may wonder what are in-image-ads? When visiting a web page, you might notice that the ad comes out when the mouse hover over an image. That's the in-image ads. In-image-ads companies provide relevant services using image-recognition-technology. There are many in-image-ad companies who offer this service like gum gum
Graphic design photography
Photography and graphic design are very important to each other. For this reason, a graphic designer is deserving of the photographer for his work. You can work from home. There are many such works available in the online marketplace. You can earn money by taking photographs for a graphic designer.
Revenue by selling pictures on the Internet
Another best way to start earning money from photography is to sell image through the stock photography website. You need to sign up for the stock photography website. You have to upload some of your photos and submit them for approval. If someone purchases your photography, then the Stock Photography website will provide you a commission of paid money which is usually up to 50%. There are many websites, such as SmugMug, iStock Photo, Fotolia, Photocrati, Shutterstock etc.
Earn money as a freelance photographer
You can earn money by contacting local magazines as freelancers or by signing up at the online Marketplace. Nowadays there is no shortage of freelance photographer. On the other hand, there are plenty of jobs available in the online marketplace. However, you must have a good and strong portfolio to work as a freelancer. It increases your chances of getting more work done.
My request to the experts on this topic: If there is any wrong information here, please make a comment.
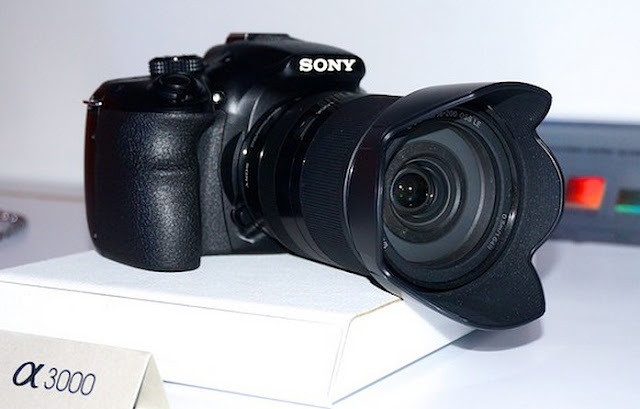
Easy way to unlock your artsy side with Sony A3000 Mirrorless Digital Camera, It can take professional-looking 20 megapixel photos effortlessly. Frame-worthy images and HD video shoot. Also it can take fast-action to capture with DSLR quality and a lightweight camera you can take everywhere. Sony A3000 is most powerful Interchangeable Lens Camera. There are about 3 dozen lenses available for this mount that you can change.
Price: $359.99 with 18-55mm lens Body type: SLR-style mirrorless
Quick view of Additional Features
- QVGA Tru-Finder™ Eye-level viewfinder
- Up to 3.5 fps shooting
- Multi Interface Shoe connector
- Picture Effect modes
- Auto Object Framing
- Dynamic Range Optimizer (DRO)
- Auto HDR mode
- Face Detection/ Registration technology
- Sweep Panorama™ Technology
- Six Creative Style settings
- Photo Creativity Interface
- Clear Image Zoom
- Convenient USB charging
- TRILUMINOS™ Color
Complete view of specification
Sensor: 20.1 MP APS-C size HD image sensor
The a3000 uses the same sensor format that Sony builds into its full-sized DSLR cameras. With 13 times the area of the typical point-and-shoot image sensor, APS-C sensor size makes the difference between “snapshots” and “photographs,” delivering an exceptional combination of high resolution, high sensitivity and gorgeous, blurred backgrounds.
- Max resolution 5456 x 3632
- Other resolutions 3872 x 2576, 2736 x 1824
- Image ratio w:h 3:2, 16:9
- Effective pixels 20 megapixels
- Sensor photo detectors 20 megapixels
- Sensor size APS-C (23.5 x 15.6 mm)
- Sensor type CMOS
- Processor BIONZ image processor
- Color space sRGB, AdobeRGB
Image:
- ISO ISO 100-16000 selectable in 1 EV steps
- White balance presets 9
- Custom white balance Yes
- Image stabilization Optical
- Image stabilization notes Lens-based (where applicable)
- Uncompressed format RAW
- JPEG quality levels Standard, Fine
- File format
- JPEG (Standard, Fine), RAW+JPEG
Optics & Focus:Quick Auto Focus in Live View
If you enjoy taking photos via the large 3.0" LCD screen over the viewfinder, then you'll be thrilled with the performance of the a3000 optimized auto focus feature. It's intuitive operation means you'll never miss the action or get frustrated waiting for your camera to focus as you shoot stunning images or HD video. This is an ideal feature for photographers who prefer to keep contact with their subjects.
- Contrast Detect (sensor)
- Multi-area
- Center
- Selective single-point
- Tracking
- Single
- Continuous
- Face Detection
- Live View
Screen / viewfinder: QVGA Tru-Finder™ Eye-level viewfinder
This eye-level, through-the-lens, viewfinder with 100% coverage begins with over 200k dots for impressive resolution. You can also see the results of camera adjustments in real time with superb color and detail.
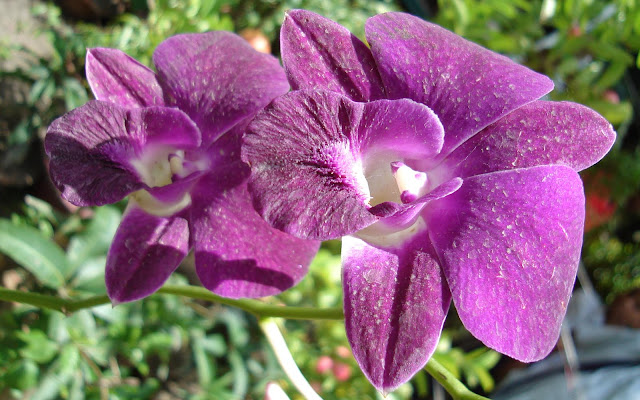
Today, it would be very unusual to find too many people that are still clicking away on the traditional film-based cameras, for now-a-days, both professionals as well as amateurs know of only one way to shoot pictures and that is the digital photographic way. Thus, it would pay for you to know of the best digital photography techniques in order to get the best out of your digital camera, and because it is now free to shoot pictures, you can view whatever you have shot on the LCD screen on your camera and not have to wait for the film to be developed or worry about paying development costs either Take Several Shots
Thus, the simplest of all digital photography techniques is to take several pictures that will help ensure that you get at least one shot that is exactly as you wanted. You can also use simple digital photography techniques by varying the settings on your digital camera to allow for various effects and thus create more artistic pictures by simply changing the ISO and shutter speed as well aperture. In fact, there are a number of digital cameras that have pre-configured settings for you to select and then are able to shoot the picture with even more precise settings.
This is a very simple digital photography technique that can be used even for taking shots that the settings were not intended for, which will nevertheless still provide you with very unique outcomes.
The one thing that some users of digital cameras complain about the most is the relatively long time it takes to focus on a subject as compared to the amount of time that traditional film cameras take. The worst thing is that in case your focus gets delayed, you can even miss taking a shot, though now there are the new digital photography techniques that can be used to overcome this problem in which all you need to do is to point at the subject and press the focus knob half way down and then simply wait till the focus locks onto the subject. As soon as you want to shoot the subject, you push the button completely and your camera will do the rest for you.
Another very useful digital photography technique is using an optical viewfinder that may not be a feature that is found in all digital cameras, but is still very useful when the LCD view is not too clear because of conditions such as when the day is especially bright and sunny. However, in case you don’t have an optical viewfinder on your digital camera, you can still use the tried and tested digital photography technique and that is to take several shots till you get one that is just right.
Digital photography has many such innovative digital photography techniques that you can use that makes this new form of photography a real pleasure and which provides endless fun to all manner of photographers ? from a newbie to the most professional photographer.


